Communication
The most important part of any project with Arduino I feel is the communication to the user. To display the readings of a sensor or to ask for a command from the user is the basic importance of most projects. Arduino's most effective form of communication is the Serial Communication. In this tutorial we shall try to understand how to setup a serial communication link with the computer which is programming the device and use the same to debug programs and also to display results in understandable formats.
Theory
Serial Communication in itself is quite vast. Hence, we'll address it as different tutorials. This basic tutorial will concentrate on a simplex mode to equip the user to use these tools for future tutorials and the whole communication protocol will be explained in tutorials to come.
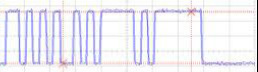
Serial communication on the very basic level uses three lines. Tx(Transmitter), Rx(Receiver) and GND(Ground) lines.Data are encrypted as sets of pulses and sent on either the Tx or Rx line with respect to the GND. These pulses are usually 10bit data unless otherwise mentioned. The 10 bits consists of a start bit, a stop bit, and a 8 bit data. This constitutes one packet of data.
The rate at which the bits are transmitted is known as the 'baud rate' . Once serial transmission is enabled, the contents of a memory location known as the 'data buffer' is transmitted. As soon as it is empty new data can be written into it and it is transmitted at the baud rate.
This much is enough to understand basic serial transmission. Onto the practical section.
Practicals:
Since this is the basic communication tutorial, we will concentrate on the built in serial communication through the USB cable. The actual way of using serial communication is through the Tx and Rx pins which we will cover in later tutorials.
Components:
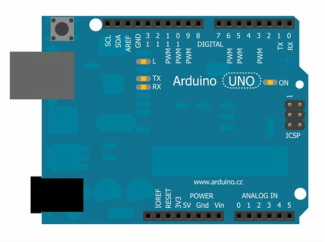
- Arduino
- The USB cable that comes along with it to program it.
So this tutorial has no external setup. Onto the code!
Components:
- Arduino
- The USB cable that comes along with it to program it.
So this tutorial has no external setup. Onto the code!
|
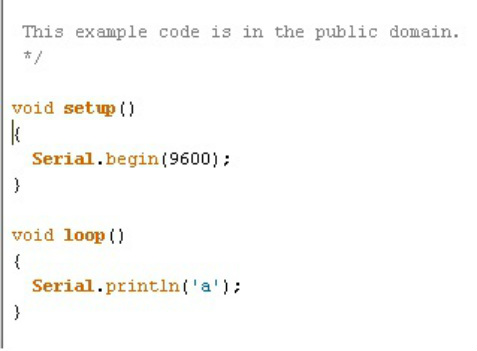
The code is the simplest of all!
In the setup we initialize the baud rate of the serial communication. In this case, its set to 9600. This means that the bits are transmitted at the rate 9600 bits per second. In the loop we are continuously transmitting the letter 'a' infinitely.The subclass println signifies that the Arduino prints the character 'a' followed by a 'ln' or new line. These again are command bytes sent along with the data. The ASCII equivalent of this would be 10 and 13 (refer to carriage return and new line). This means that the Arduino first prints the character 'a' then returns to the start of the line and then creates a new line. These are the sequence of commands sent on the serial line. |

When you run this program and look at the Serial Monitor window, you'll see the character 'a' being printed in each new line continuously.If not make sure the baud rate on the serial monitor is set to 9600. If a new line is not desired (if its required to print a string), use Serial.print instead of Serial.println .
Thats it! a simple communication program.
Thats it! a simple communication program.
Food for Thought
A packet of Questions!
Q. Instead of writing ASCII characters, I want to write bytes of hex values. Is it possible?
A. yes, for that its preferable to use Serial.Write(value). It prints the hex values as bytes of data.
Q. I want the data to be transmitted on the Tx Line. Not on the USB..What do i do?
A. It is actually printing on the Tx Line! The USB lines tap the data from these lines and convert it to USB protocols to make life simpler. Otherwise the same data is actually coming on the Tx line as 97('a') 10 and 13.
Q.How important are these baud rates and why the funny number 9600?
A. Well basically, these bauds are standard rates decided long ago for uniformity. Both ends of the Tx and Rx lines need to have the same baud to be able to communicate. If the bauds are different then, the communication wont occur properly. These funny numbers are a result of the dividing possibility of a 11.0592Mhz crystal. That frequency can be divided accurately to get these baud rates. But actually the Arudino uses a 16Mhz crystal :) .
Q.What about receiving data on the Arduino?
A. Will be answered in future tutorials as it requires a little more understanding.
Q.How fast can we transmit data ?
A. It depends. Actually after the transmission of a data, its desirable to introduce a delay before transmitting to ensure the buffer is emptied properly. Therefore a delay of 2ms in the above program after the transmission of the character 'a' would ensure almost error-free transmission. The baud rate themselves can be increased upto 115200 baud for Arduino family.
