How to make a PCB (DIY) at Home
Introduction
In today’s world executing college projects is becoming more and more competitive and time consuming. Added to this, the final exam scores are also dependant on how well the project is conceived, executed in time and it actually works ;-). I myself struggled a lot while executing college projects which were electronic hardware based. The one constant worrying factor was “how to make a PCB”? The PCB should be according to my requirements and my design. And now I have somewhat mastered the process of making a PCB and here are directions for making it yourself (Do-It-Yourself). Steps to make a PCB at Home 1. Designing the PC 2. Printing the PCB Design
3. Obtaining the required components Components Required: - PCB Copper Plates (size of your design) Choose one which is slightly bigger than your PCB design borders. Too much space outside the design border will waste copper and cause longer time to etch. - PCB Etching Powder The etching power is actually the Ferric Chloride powder that I have used and easily available in shops in India. You can ask simply for PCB etching powder also. - Iron Box - Water Pump (used in Fish Aquarium) Usually this costs around Rs. 100 and is available in Fish Aquarium shops. Make sure you also get the plastic tube attached to the pump. - Scissors and Tape - Wire Mesh Scrubber 4. PCB Etching Procedure
Tips:
|
Printed Design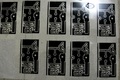
Copper Plate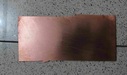
Aquarium Pump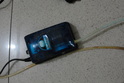
Printed Design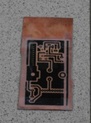
Accessories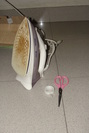
Immersed in Liquid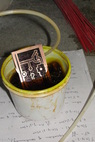
PCB Ready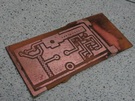
|
