First Steps
First the Installations,
If your running windows, installing winAVR will do the job. Though the programming becomes a problem when u want to burn your program onto the chip.
IN THIS TUTORIAL I WILL BE EXPLAINING ONLY THE LINUX PART, To PROGRAM IN WINDOWS YOU NEED TO KNOW ABOUT MAKE FILES. I DO NOT WANT TO GET INTO EXPLAINING THE MAKE FILE HERE. MAYBE IN A FUTURE POST I WILL.
First install the dependencies:
sudo apt-get install gcc-avr avr-libc avrdude
You will also require a coding platform like codeblocks
sudo apt-get install codeblocks
Now your ready to start programming!!!
The first Program!
To write the first program, start code blocks,
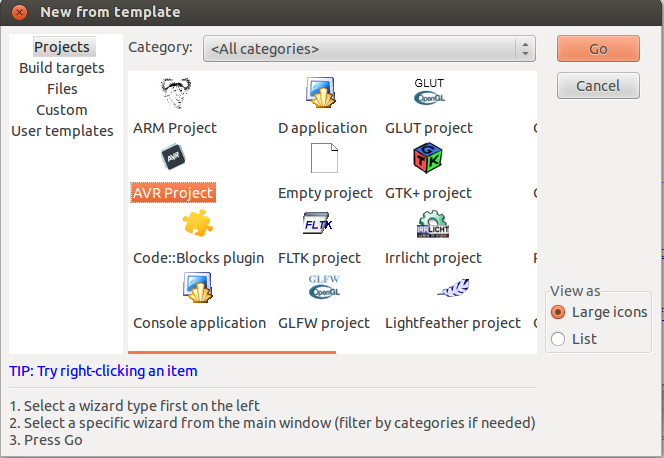
Select Create New Project, In the dialog that appears choose AVR Project, and click on go.
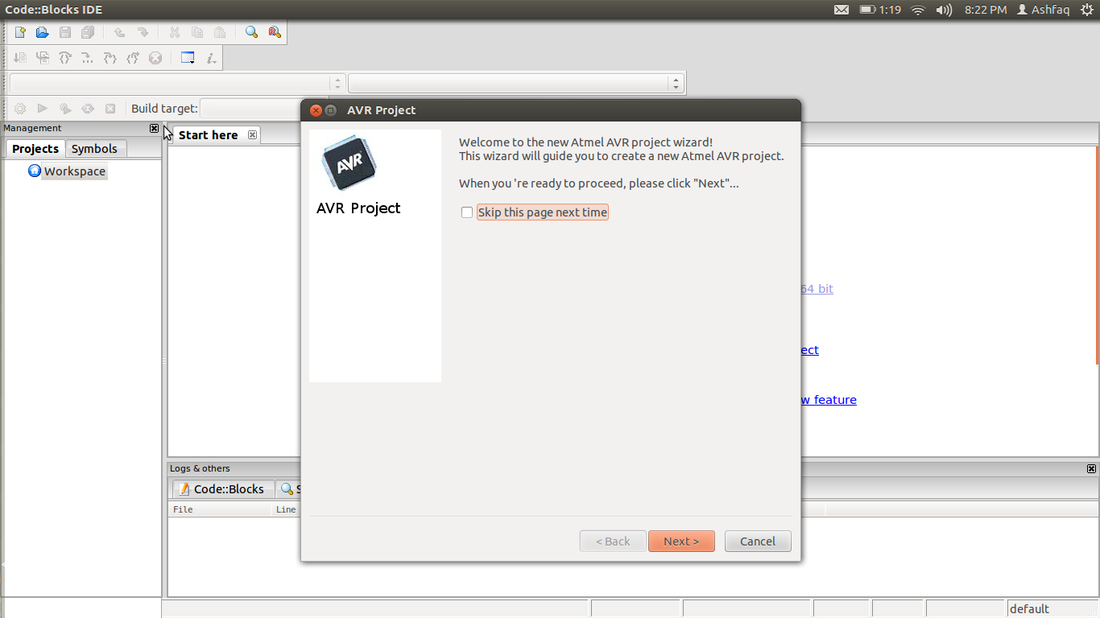
Next you will be prompted with a wizard, follow the wizard its easy to understand.
Those who do not understand can follow the screen shots posted bellow.
Select Create New Project, In the dialog that appears choose AVR Project, and click on go.
Next you will be prompted with a wizard, follow the wizard its easy to understand.
Those who do not understand can follow the screen shots posted bellow.
Click Next.
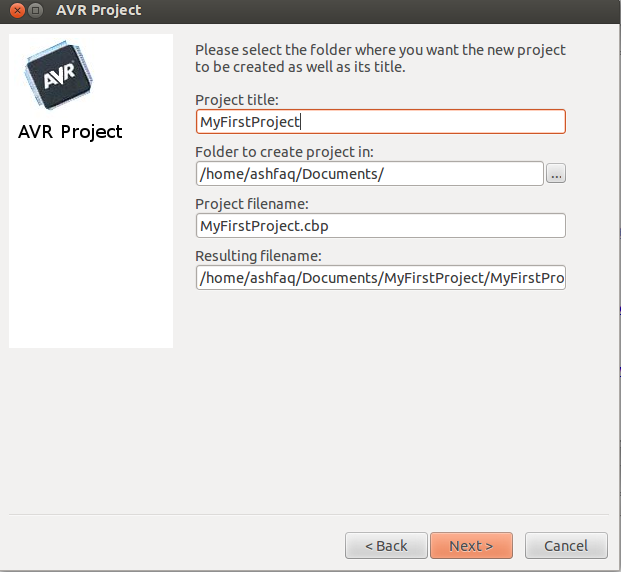
Enter the name of your project,And its location
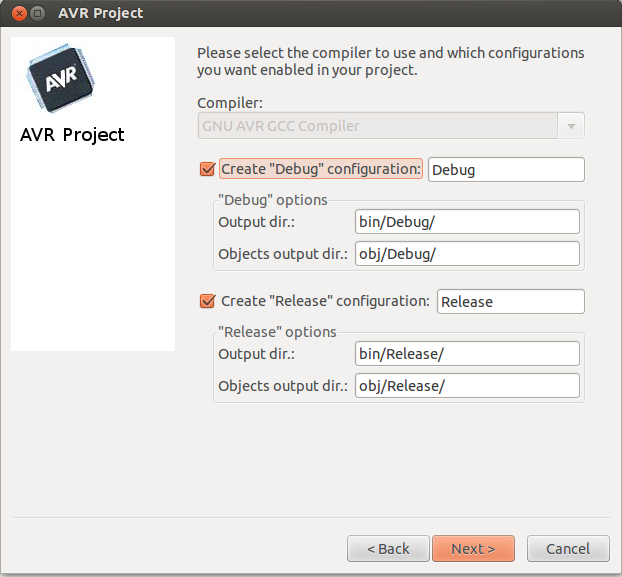
Keep this as the default settings,Make changes only if needed

Choose the AVR controller which you will use.
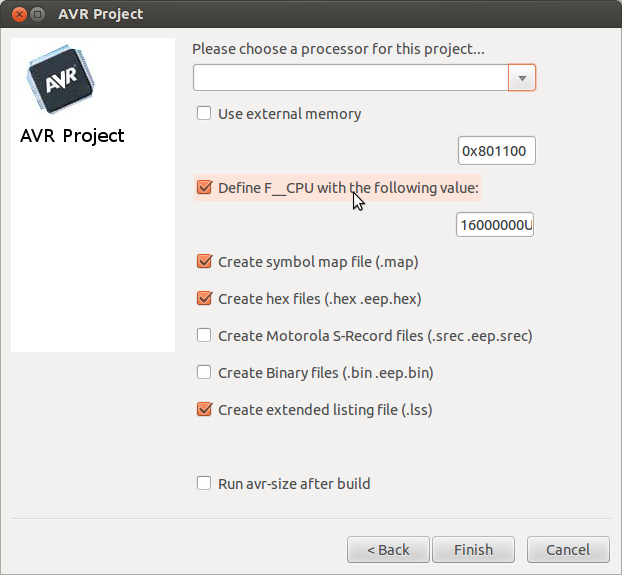
Keep these settings as is, then
Finally click Finish
The First Program
Once Your done with the above Wizard, You will have the following screen.
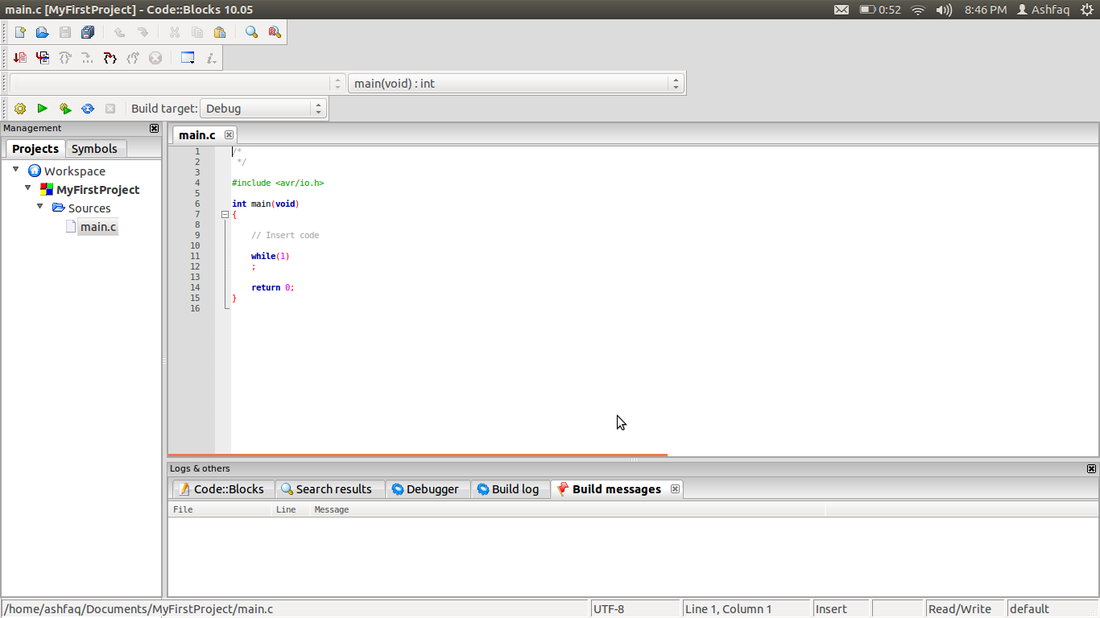
Here is where you need to type in your code.
we shall get into the details of coding later, Right now we shall write a simple blink led code.
Do not panic if you do not understand the code, We will take that up in subsequent tutorials. The point of this tutorial is to get started with the AVR.
#include <avr/io.h>
#include <util/delay.h>
int main(void)
{
DDRB=0xFF; //all pins of PORTB declared as output
PORTB=0;
while(1)
{
PORTB=0xFF; //High State
_delay_ms(200); //delay
PORTB=0; //low state
_delay_ms(200); //delay
}
}
Then Build the program, by clicking on ctrl+F9 or in the menu Build>build
One very common error we get is as shown, do not panic if you have this error or something similar.
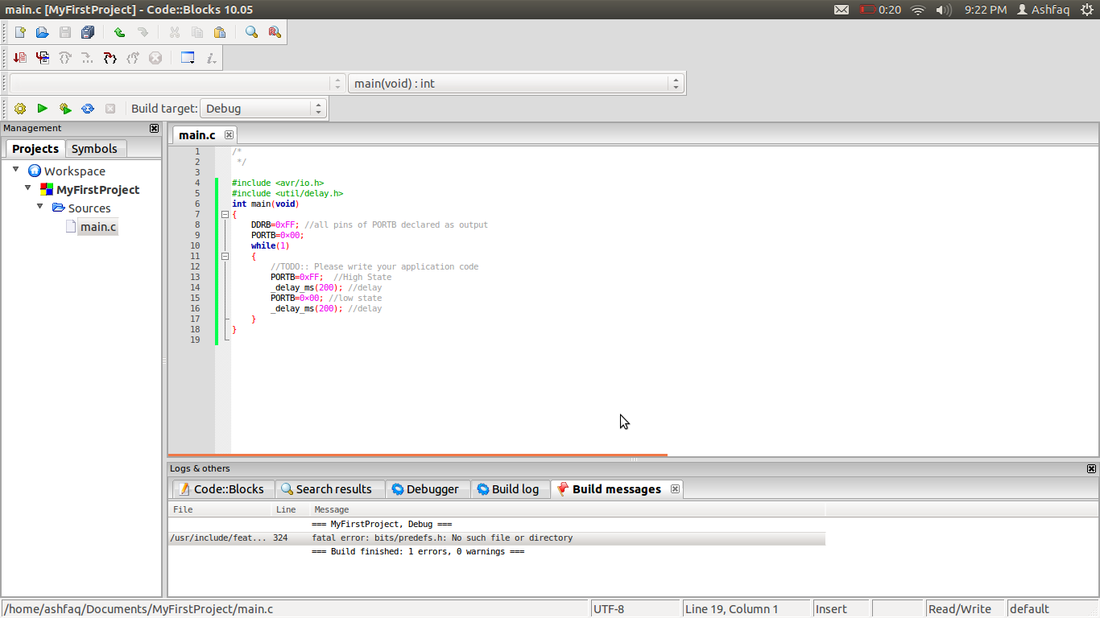
This error is because the build paths have not been correctly configured. to rectify this:
Project>Build options
under the search directories path add the location of avr libraries.
This is generally located at
/usr/x86_64-linux-gnu/include
Now compile your program and it should work. In case there is another error leave a comment here and i shall try to help you.
Once Built you will get a message saying :
||=== Build finished: 0 errors, 1 warnings ===|
You can ignore the warnings and move ahead.
Uploading Your program
To upload the program written on your computer you need a programmer.There are a variety of programmers available, here i choose to use the USBASP, cause its easily available, You can buy it in the market or order it online.
If your interested you can make your very own programmer for details look here: USBASP
The pin connections are as follows:
USBASP | Target
VCC | VCC
GND | GND
Reset | Reset
MISO | MISO
MOSI | MOSI
SCK | SCK
Use the data sheet of the micro-controller you are using to find these pins.
once connected plug in the USBasp to your computer.
The light glows on the usbasp, Open your terminal.
On the terminal browse to your project folder using the command:
cd /path/to/project
In the project you need to browse into the bin/debug/ folder:
for the project i created the snap shot is below.

On running the ls command a list of files will be displayed. These are the output files which were explained in the previous tutorial.
The .hex files are the files we will use now.
To burn the program we use a tool called avrdude.
The command to run this is as follows:
avrdude -p m8 -c usbasp -e -U flash:w:<filename.hex>
The meaning of the above command is as follows:
-p is the switch used to specify the target IC. here i have used an atmega8, thats why m8.
if i was using an atmega32 it would be m32 and so on
-c this is used to specify the programmer used, as we are using usbasp we give the name.
-e tells avrdude to erase the chip first
-U flash:w:<filename.hex> this is used to tell avrdude to use the flash memory provided on the chip, the w specifies write.
for more details on avrdude use the command:
man avrdude
Common problems faces while using avrdude:
avrdude: error: programm enable: target doesn't answer. 1
avrdude: initialization failed, rc=-1
This is due to some connections being wrong between the usbasp and the target IC.
Try exchanging MISO and MOSI
